How to make DIY beeswax candles
Don’t you love the warmth and glow of a candle?
It’s so relaxing and soothing, yet it can also be very unhealthy if you choose the wrong one.
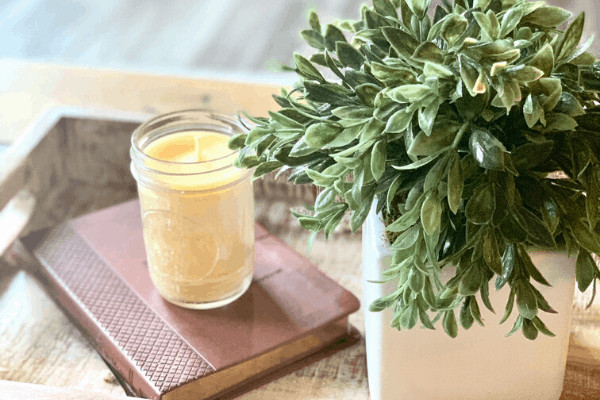
Beeswax candles are clean, beautiful and very easy to make.
Keep reading to learn how to make your own homemade natural beeswax candles!
This post contains affiliate links.
Are Candles Toxic?
Most candles are made with paraffin wax and have been shown to release carcinogens like toluene and benzene into the air.
Paraffin is a petroleum waste product and has to be deodorized and chemically bleached before it can be made into wax.
In fact, the toxins released from paraffin candles are the same as those found in diesel fuel fumes.
That’s definitely enough to make me rethink candles!
Additionally, many scented candles also have wicks that contain heavy metals like lead, and even a few hours of burning them can create very high levels of airborne heavy metals.
In the US, candle wicks are supposed to be made of cotton or paper, but studies have found that as much as 30% of candles contain heavy metals in the wicks.
They can also contain artificial scents and dyes, which release additional toxic chemicals when burned.
Thankfully, there are some alternatives to paraffin candles.
One alternative is soy-based candles, but I personally prefer to not use soy because of the links between soybeans and hormone disruption, plus the majority of soy is genetically modified.
You can check out some of the studies throughout the years on the adverse effects of soy here.
This leaves beeswax candles as my favorite alternative.
Beeswax is not only safe, but also has many added benefits as well!
What Are The Benefits Of Beeswax Candles?
Negative Ion Generator
Beeswax candles have been proven to produce negative ions when burned, and those ions help to neutralize pollutants in the air.
Negative ions actually clear air of mold spores, pollen, dander, odors, germs, dust and other icky particles.
Most of these are high in positively charged particles, and since opposites attract, when the negative ions grab hold of the polluting particles, they become too heavy to remain airborne.
So they drop to the floor or other surfaces where they can easily be cleaned right up with a vacuum or duster.
Some of the other great benefits of negative ions are:
- Improves breathing rate, decreases blood pressure and relieves tension.
- Helps you sleep better by normalizing serotonin in the brain.
- Often called a natural antidepressant, it increases your mental clarity.
- Reduces headaches and other illnesses.
Asthma/Allergy friendly
Because of the clean burning of beeswax and it’s tendency to reduce air pollution, beeswax candles are an obvious choice for those with asthma or allergies.
People with asthma, allergies and sinus problems have reported significant improvement in their symptoms after burning the 100% pure beeswax candles in their bedrooms for three to four hours before bedtime.
There’s not much hard evidence on beeswax and asthma, but if it’s possible that something as simple as burning a candle might be able to help your respiratory problems, it’s at least worth a try!
Better For The Environment
Beeswax candles are non-toxic, smoke-free, soot-free and made from a renewable resource so it is definitely more eco friendly.
It’s a natural, biodegradable wax and instead of polluting the air, it cleans it!
No Harmful Chemicals Or Toxins
The production of soy and paraffin candles involve chemical intervention to work the raw material into a wax form and then into a candle.
Beeswax is used in its native, raw state which does not involve bleaching or hydrogenation.
The best beeswax candles will not have any added chemicals or synthetic fragrances, which could negate any of the great benefits of the beeswax!
They Burn Brighter And Longer
Because beeswax has a higher melting point than other waxes, it emits a brighter flame.
Beeswax candles also last longer than most other candles. Because it is so dense, it burns slower and drips less.
Other candles usually contain additives to make the candles burn longer, but beeswax does it naturally!
Supplies Needed To Make Beeswax Candles
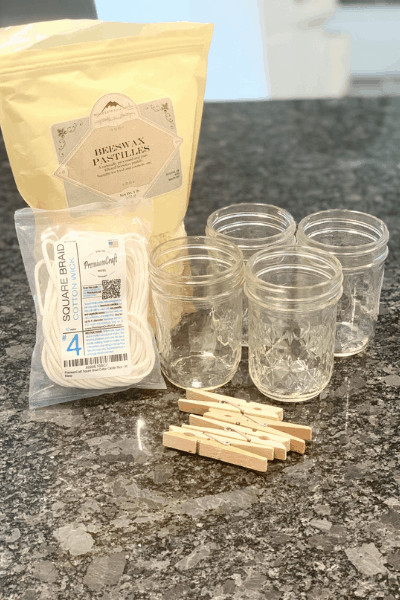
Wicks
I used this 60 ply cotton wick that was recommended by a fellow candlemaker. It worked well and I will use it again but it depends on user preference as well.
I simply used clothespins to help keep my wicks secure but I can see the draw of pre-tabbed wicks since they will set in the jar easier so you could use those if you prefer.
Wicks also need to be a little bit thicker for beeswax candles so keep that in mind. It will ultimately take some experimentation to see what works best for you.
Wax
There are different forms of beeswax you can get, including bricks and pellets/pastilles.
You will want to make sure it is good quality beeswax too to make sure you get all those great benefits!
I have made candles with different types of beeswax and my ultimate preference was from Mountain Rose Herbs for it’s pretty light color and it just set really well.
I have also used beeswax from Amazon and had good results with that as well, though it was a brighter yellow and had a bit of a stronger smell.
Beeswax is a natural product and hence has its own unique smell.
It’s smell, just like it’s colour, is dependent upon what the bees who made the wax were feeding on at the time the wax was harvested from the hive.
Beeswax naturally has a bit of a honey scent (for obvious reasons) but it can also smell slightly smoky because of the processes used to harvest it, which is normal.
Jars/Containers
You can get totally creative with the jars you decide to use for your candles!
I already had some half pint mason jars lying around so I used those, but you can use whatever you want.
Just keep in mind that the diameter of the jar will influence what size wick you need and how well it will burn.
Check out the video below for more info on jar sizes.
Double Boiler System
This is important, you definitely want to use a double boiler when melting wax, otherwise it will burn.
If you don’t have a double boiler, you can create one by placing a couple inches of water in a pot, placing a smaller pot or stainless steel bowl inside, and bringing the water to a low simmer.
Coconut Oil
This is completely optional, but I opted to add coconut oil.
Why make beeswax candles with coconut oil?
Basically, mixing the wax with a little bit of coconut oil will bring down the melting point just a little bit so the wax won’t burn quite as hot and it will prevent tunneling.
Here’s a great video that goes into some tips and tricks on the best supplies and techniques to use:
How To Make DIY Beeswax Candles
You’ll need:
- 1 lb beeswax (I prefer beeswax pellets)
- 1/2 cup coconut oil
- 60 ply cotton wick
- double boiler (or pot and heat safe bowl)
- jars (this will make 3 half pint mason jar candles)
- optional: essential oils
Instructions:
1. First, if using wicks without a tab, cut them to length a little longer than the jar you are using and set aside.
2. Next get your water simmering in your double boiler and place your wax in the top bowl. I recommend dedicating a specific bowl just for candle making because beeswax is NOT fun to clean up afterwards. Make sure you stir often, I just use a wooden skewer stick that I can throw away afterwards for easy cleanup.
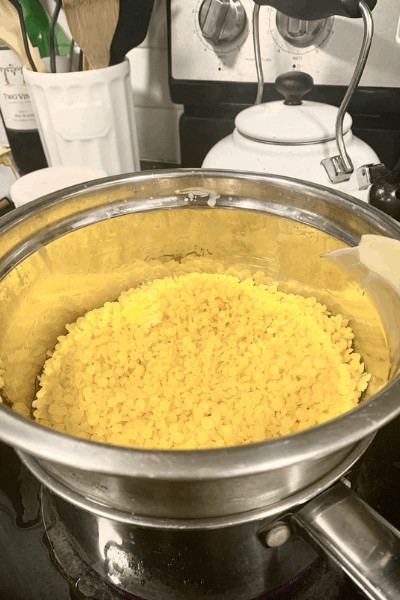
3. Once the wax is completely melted, remove from heat and add the coconut oil and any essential oils you may want to add. Stir it in until thoroughly mixed.
4. Pour a little bit of wax into the first jar so there is about a half inch of wax at the bottom, then return the wax to the heat to keep it melted. Place a wick into the center of the jar and hold it in place for about 2 minutes or until the wax is just solid enough to hold the wick in place by itself.
5. Once you can let go of the wick and it will stay in place, let it cool about 5-10 minutes before filling the jar up the rest of the way with wax, leaving about an inch of headspace. I used wooden clothespins to help keep the wick in place for added support as well.
Repeat with the other jars.
You will probably have to reheat the wax several times because beeswax sets very fast but that is totally fine.
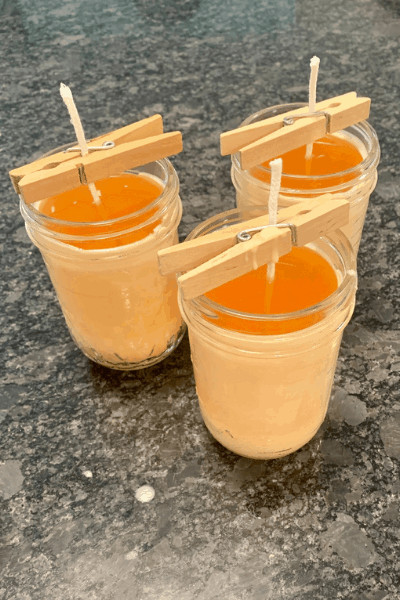
6. Beeswax can sometimes crack if cooled too quickly so you will want to place them in a warm area to cool. After my jars were filled, I placed them on a cookie sheet and set them in the oven on the lowest setting and let them cool in there for a few hours.
7. Allow your candles to cure for a few days, then trim the wicks to about 1/2 inch.
Make sure when you first burn your candles, to let them go for several hours to make sure the whole surface has melted. This will prevent tunneling.
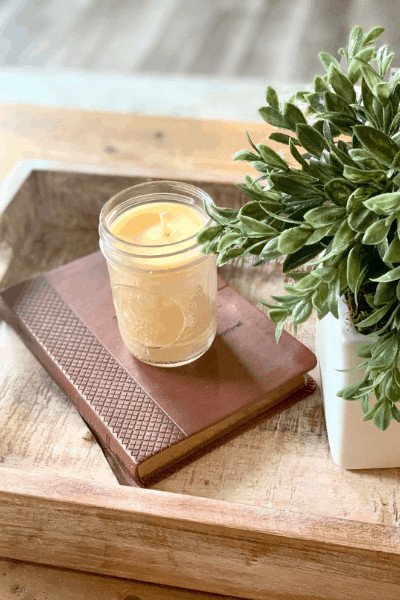
How To Make Beeswax Candles With Essential Oils
Beeswax does not hold on to scent super well so if you decide to put essential oils into your candles, I recommend significantly strong ones, like peppermint or cinnamon.
You still have to add quite a bit though for it to come through the candle. For this reason, I tend to just leave them out but sometimes I will add some and just be a little extra generous!
enjoy!
Related Articles:
DIY Natural Cleaning Recipes (Plus 8 Ingredients To Avoid!)
How To Have A Healthy Home And What Can Make It Unhealthy


So beautiful! I love products made out of beeswax. Bees are awesome!
I used to love candles until my asthma got worse. I love that i can use candles again.
I love the smell of beeswax, but I didn’t realize it was so powerful in combating indoor air pollution! My husband is really sensitive to dust and mold, so this is really helpful for us!
I really enjoyed your tutorial on making beeswax candles! Your instructions were clear and concise, making it easy for beginners to follow along. I appreciate the helpful tips and safety precautions you included. Keep up the great work!
I didn’t realize that about non-bee’s wax candles, good to know and also glad to know DIY Bee’s Wax candles are easy to pull off and healthier to have around!!
I have never tried to make my own candles before. I’ll have to give it a try. Thank you for sharing the process.
I love scented candles. like that those are not toxic. It would be fun to make those beeswax candles.
I think I need to start making my own candle now thanks for sharing this with us
i do have some beeswax leftover from a different project.. your post has inspired me to try to make candles now
You have inspired me! I love candles, but I have never made my own before, I love beeswax candles too and I think I might have to have a go.
I had a candle making kit once and loved it, I did not know about adding coconut oil to it great tip
Oh, I find that homemade beeswax candles are a safer and natural way to take part in candle making. Thank you for this!
This blog post is an eye-opener! I love the ambiance of candles, but I had no idea that most of them, especially paraffin candles, could be so toxic. Learning about the potential release of carcinogens and heavy metals into the air is concerning. Making natural beeswax candles seems like a fantastic alternative to avoid these harmful chemicals. Thank you for sharing this important information and showing us a safer and healthier way to enjoy the warmth and glow of candles! 🕯️🌿
This past few days I love the smell of a candle. And I cant wait to make my own. Thanks for these.
I’ve always wanted to make my own candles. Thanks so much for this. I think it’s really a good time for me to start making them.
Beeswax candles omg this seems awesome!!! I am very excited to try out these candles. I am not sure about making them tho lol…I would love to try.
I remember having a beeswax candle set when I was little and we would roll the beeswax paper into candle sticks. It was so cool and fun as a little girl. I think homemade candles are so much fun!
It looks amazing! I wish I was as gifted as you are to make it!
I had no idea beeswax candles burn for longer and also are more asthma friendly! Thank you for sharing this.