
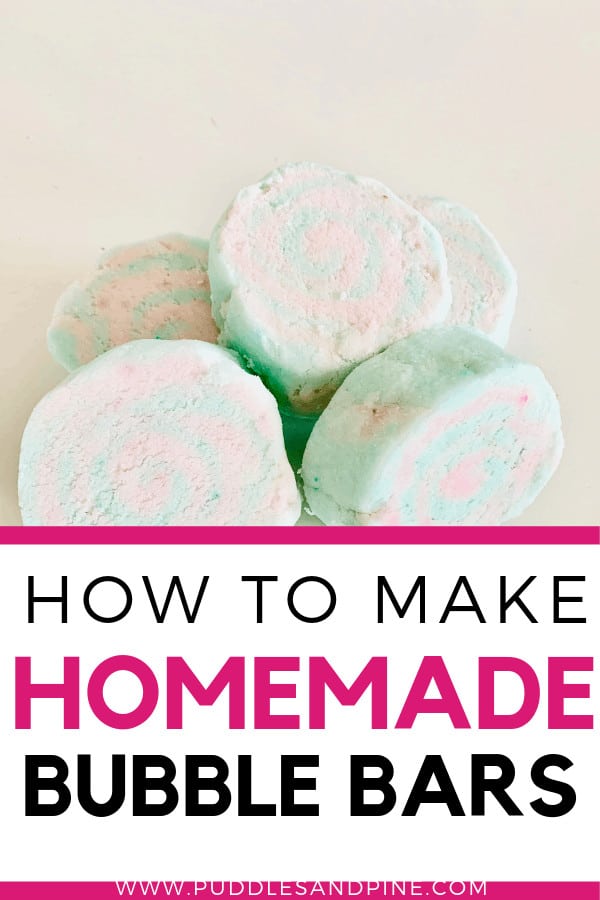
DIY Bubble Bars Recipe
There’s nothing quite as cozy as a bubble bath.
These easy homemade bubble bars are just like Lush’s, which is what inspired me to experiment with this DIY natural bubble bar recipe.
If you have struggled with making homemade bubble bath but end up with sad, barely there bubbles, then check out how to make bubble bars!
Why make homemade bubble bars?
I am seriously addicted to Lush, like I could spend forever in their stores given the opportunity.
I am not fortunate enough to live very close to one so when I do get into one of their stores, I stock up and buy loads of bath bombs and bubble bars….which gets pretty expensive.
Lush bubble bars range from $7 to $13 each, which is pretty pricey for bubbles, even if you split it in half.
I’m all for indulgences now and then and I will always love Lush products but I figured out a way to get those awesome bubbles for a fraction of the price!
Another thing to consider is that sometimes Lush irritates your skin – in particular, my kids. For sensitive skin, we ended up buying alternatives, like Bubble Podz.
With all the ingredients used, I had enough to make about 2 batches which makes each bar about $2-$3 each.
Which is great because I am pretty serious about taking bubble baths, probably because I’m always cold and bubble baths are pretty much the coziest thing ever.
These bubble bars were super easy to make and don’t take long at all to put together, they just take about 72 hours to dry completely before you can use them.
You’re gonna want to make sure you keep them up high while they are drying though, otherwise your kids might grab one and bite into it….like mine did.
How to customize your bubble bars
A fun part of making these bubble bars yourself is that these are 100% customizable!
You can add whatever color you want (I’m a sucker for pastels so I was pretty conservative with my colors but you could totally go bright and bold if you want) and whatever scent you want!
I use lavender oil in mine because I tend to take bubble baths at night after my kids are in bed so I could use a little extra relaxation and they are great to use FOR your kids before bed too.
You could also use citrus and peppermint or eucalyptus for a more invigorating scent.
These make awesome gifts too, you could totally dye these pink or red and add a floral scent for Valentine’s Day, red and green with peppermint oil or Christmas spirit for Christmas, maybe orange and red with cinnamon and orange for a fall themed scent.
There’s a ton of different directions you can go with these and you don’t have to make the swirl design, you could just form them into balls, use a mold or cookie cutter instead.
This post contains affiliate links.
How To Make DIY Bubble Bars
You’ll need:
1 cup baking soda
1 cup sodium lauryl sulfoacetate
1/3 cup corn starch
1/3 cup vegetable glycerin
1/3 cup cream of tartar
1 Tbsp coconut oil
1 Tbsp water
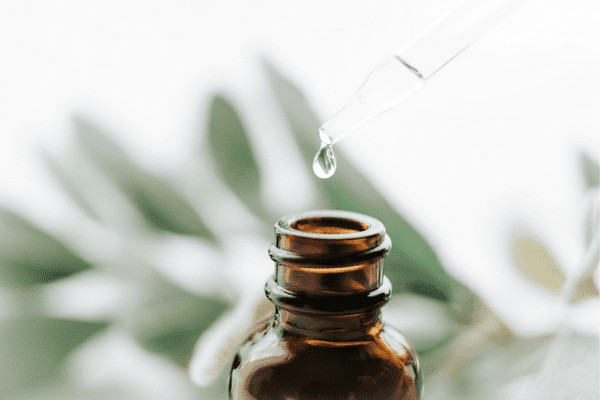
20 – 30 drops essential oil of your choice – some ideas include:
– peppermint essential oil
– lavender essential oil
– grapefruit essential oil
– orange essential oil
– lemon essential oil
parchment paper or wax paper
NOTE – Sometimes people get confused about sodium lauryl sulfoacetate and think it’s the same as sodium lauryl sulfate, but it’s not. Sodium lauryl sulfoacetate is naturally derived from coconut and palm oil and is what gives these bars their awesome bubbles!
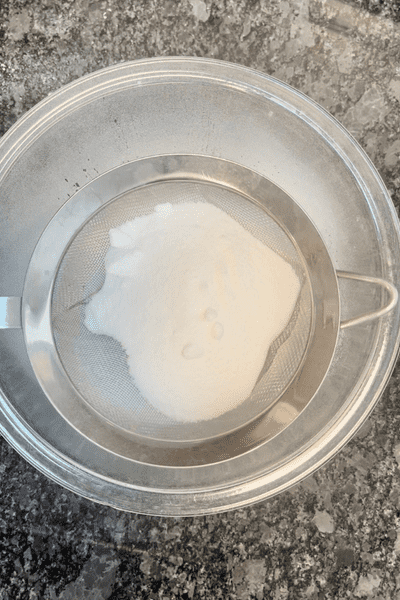
1. First combine all the dry ingredients, straining them through a fine mesh strainer to get rid of any clumps, then mix them together with your hands
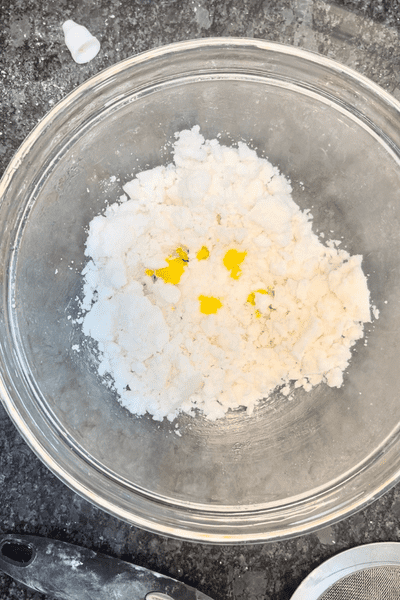
2. In a separate bowl, combine all the wet ingredients (this includes whatever essential oils you choose).
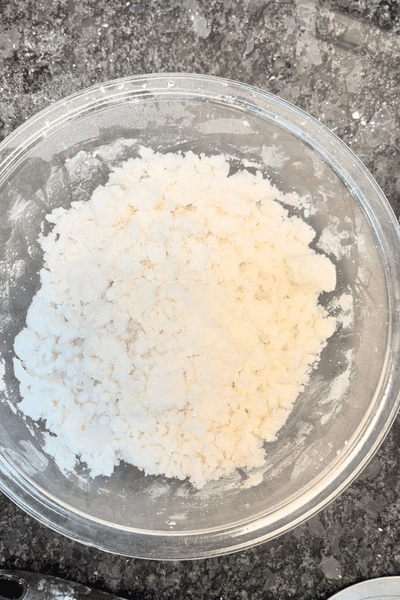
3. Combine all ingredients together and mix with your hands until it is somewhat crumbly like in the picture.
4. Separate the dough into two different bowls and add the soap dye to each bowl to make what color you’ve chosen. Make sure to mix well to incorporate all the dye
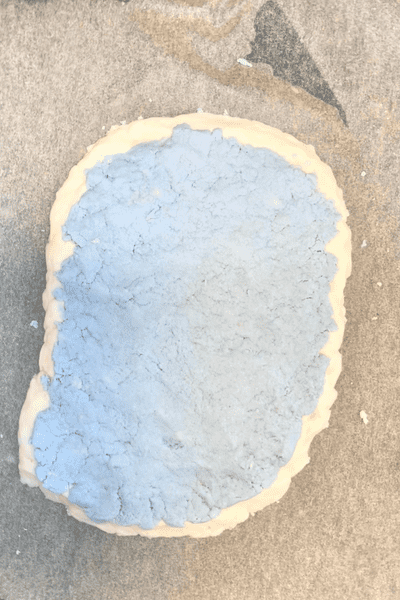
5. Put one color of dough on the parchment or wax paper and gently flatten it into a vertical rectangle, about half an inch thick. Make sure you press together any cracks that form.
6. Layer the second color on top of the first one and gently push that one down as well so you get both colors layered and press out any cracks.
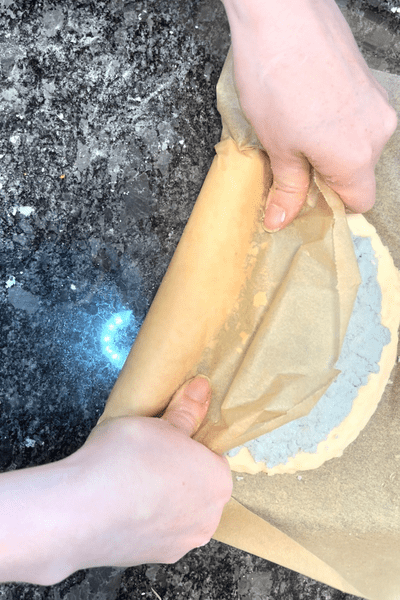
7. Using the edge of the paper, very gently lift and slowly start rolling the dough in on itself until it is completely rolled up. Make sure you continue to gently press out any cracks that form. (if you have a lot of cracking, you can try drizzling a little bit of vegetable glycerin on cracking spots to help hold them together).
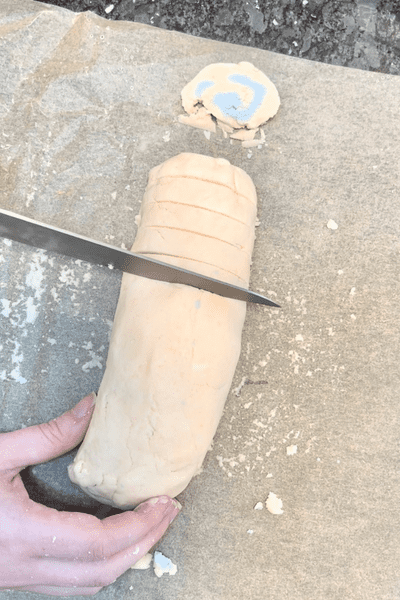
8. Cut the roll into slices very gently that are around 1-2 inches thick.
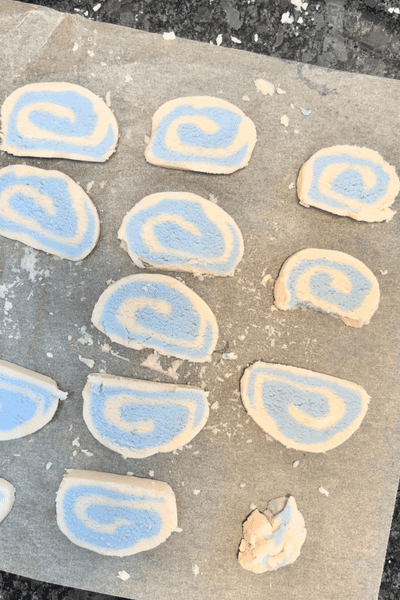
9. Place them on a tray or parchment paper to dry for around 72 hours.
To Use
When filling your tub with water, start squeezing and breaking the bar apart under the running water. After it’s completely dissolved, it helps to agitate the water with your hands to maximize the bubbles.
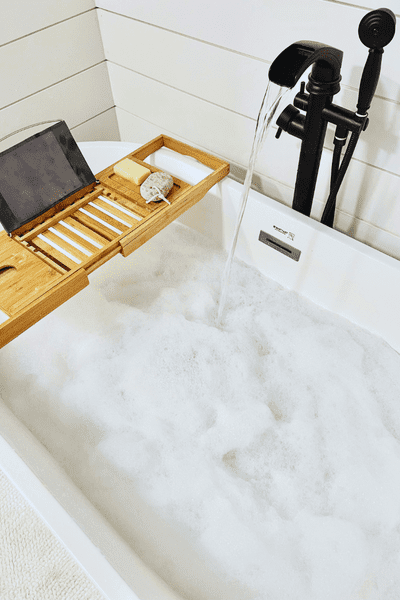
I love to make these because of how much I love Lush’s bubble bars and they always turn out great! Check out the bubbles these made when the tub wasn’t even full yet! I’ve made homemade bubble bath before and it did not generate anywhere near the bubbles that these did and they are way more fun to make. Plus they’re so cute!
Enjoy your bubble bath!
Related Articles:
What To Use Essential Oils For (What Exactly Are Essential Oils?)
One of my obsessions is taking bubble baths but had no idea you could make your own. I’m making this for sure. Thanks for the recipe.
These would be perfect for a housewarming gift! Thank you for the recipe – can’t wait to try it!!
This bar sounds awesome. I need to make one for my bath.
This is so great. I need to make some of these. My daughters and I would love them.
This was a fun post! I’m thinking these pretty bar will make great stocking stuffers for Christmas!
I have made homemade bath bombs before. I’ve never tried the bubble bars though. I’ll have to make some.
This sounds absolutely amazing and interesting, I’m surely going to try this out!
Hey! Your tutorial on making bubble bars is fantastic! The step-by-step instructions are easy to follow, and I love that you shared tips for customizing scents and colors. Can’t wait to try making my own Lush-inspired bubble bars at home!
we have contemplated making these a few times when we made a few bath salts.. looking at the ease with which you have made these (and also how colorful they always are), i am tempted to try
I do love a good bubble bath and they do look like they work incredibly well! What a fun project to do with the kiddos too…a little bit off crafting and science rolled into one!
That’s a nice idea, I thought its hard to make a bubble bar. Thanks for the information. I will give a try.
oh I had no idea you could do your own bubble bars! That is amazing…I can’t wait to make my own bars this weekend, super cool.
Oh wow, this looks so fun to make! I love taking baths with bubble bars.
What a fun and cool project. I remember as a teenager I had a soap making kit for bar soaps…it was so much fun making my own. Thanks for this!
I love bubble bars and taking baths with them, so this looks like it would be a lot of fun to make.
Just book marked this page as this will be an activity I could do with the kids as they do love lush bars
I haven’t taken a bubble bath since I was a kid. Always felt it was a kid-thing.
Ohhh I LOVE all of Lush’s products, but I can’t justify spending so much money on them. Making my own DIY bubble bars is the perfect solution. Thanks for the “recipe!”
Those bubble bars look amazing! It’s great to hear they turned out so well and created such a luxurious and bubbly bath experience. It’s always satisfying when DIY projects pay off and exceed expectations. And they look adorable too! Keep up the great work!
Making bubble bars like this just makes life lovelier. Ive been to Lush and I know they have amazing bubble bars!
These look so fun to make! I’d love to do this with my kids and let them pick their own colors and scents for themselves.
Ooohhhh….thank you for sharing this recipe and guidelines. It’s easy actually, to make these cakes of soap!
I love this bubble-bar recipe, just like you can find at Lush. I will try this because the bars at Lush can be very pricey!
These would be fun to make with my granddaughter. I haven’t heard of Lush.
It’s great that you can make these at home. I need to save this as it’s something my children would like ot do over the summer. What a lovely idea!
So fun! I bet my kids would love to do this!
Making bubble bars can be a fun and creative activity. I can experiment with different scents, colors, shapes, and textures. It’s a great way to unwind, destress, and express your artistic side. They are also great gifts!
The way you break down the ingredients, step-by-step instructions, and even the secrets behind the scents showcases your expertise in the art of crafting indulgent self-care products. Your guide is like an aromatic adventure, inviting us to create an oasis of relaxation right in our own bathrooms.
Thank you for sharing this wonderful recipe and inspiring us to add a touch of luxury to our self-care routines. Your article is a testament to the magic that happens when we infuse creativity and a dash of pampering into our everyday lives.
I’m going to make these for my son who has sensitive skin. Could I replace the vegetable glycerin with powdered goat milk?